 Responsive Design
 Identity & Logo Design
 Organic SEO
iOS 10 Email Setup
Guide to iOS 10 Email Setup
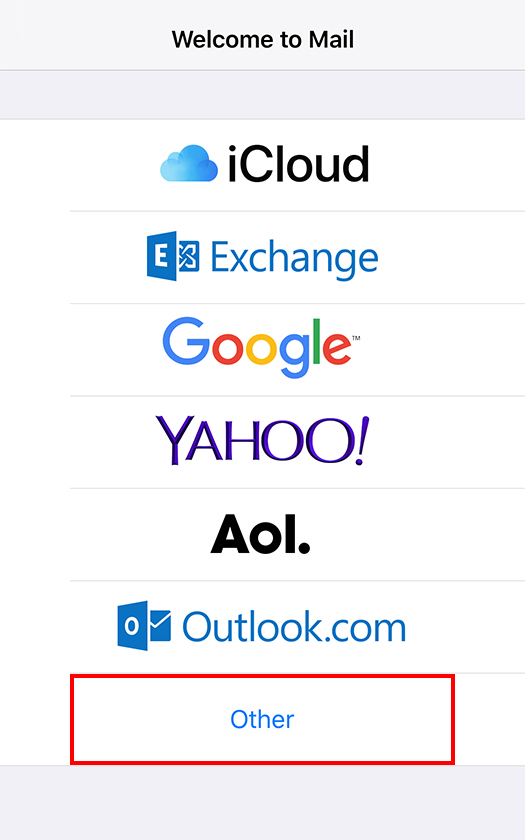
Step 1: Open Mail App
When you open your mail app you should be greeted with a bunch off different email software logos. You want to pick the ‘Other‘ option.
Please Note if you already have an email account set up you will need to go into the settings app and add a new email account in the ‘Passwords & Accounts’ menu item
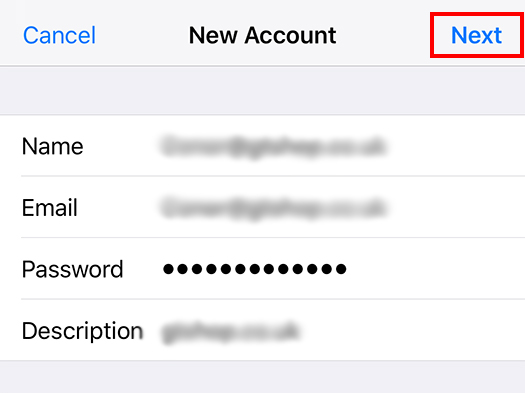
Step 2: Enter Account Information
Enter the following settings:
- Name: The name displayed when you send email
- Address: Your full email address
- Password: Your email account password
- Description: Account description of your choice
Tap Next.
Step 3: Select Account Type
Select your account type on this page. We recommend IMAP for mobile devices as messages are stored on the server which provides better syncing with multiple devices.
Step 9: Enter Incoming Mail Server Information
Under the Incoming Mail Server section, enter the following settings.
- Host Name: mail.a.hostedemail.com
- User Name: Your email account
- Password: Your email account password
Scroll down to the Outgoing Mail Server section.
Step 4: Enter Outgoing Mail Server Information
Under the Outgoing Mail Server section, enter the following settings:
- Host Name: mail.a.hostedemail.com
- User Name: Your email account
- Password: Your email account password
Please note that the outgoing mail server setting is not optional. You will need to enter this information in order to properly configure the account.
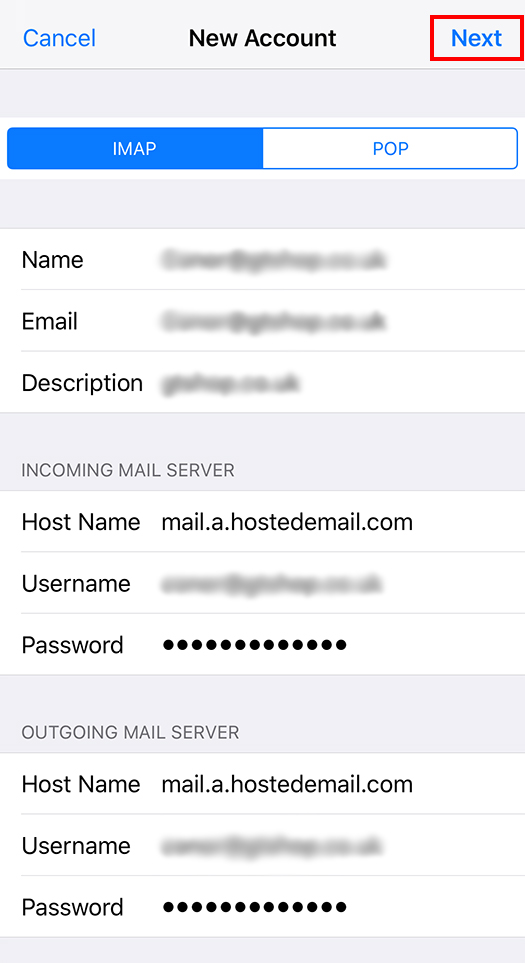
Tap Next to complete iOS 10 Email Setup.
Please note that each email address you have with our email hosting packages with us is limited to 5GB of server storage. If you exceed this limit, you’ll need to either clean-up your email (by deleting old or unused communications), or request additional storage space by contacting us (additional costs will apply).