Responsive Design
 Identity & Logo Design
 Organic SEO
V12 Retail Finance
Need help setting up the V12 Finance Plugin?
It should only take you a few minutes to set-up on your site as follows:
- Upload the plugin to your site (either via FTP or the WP Admin – whichever way you would normally handle this). Make sure you’re using the latest version available – it should be able to update from the WP Admin Plugins screen.
- Activate the plugin via the WP Admin.
- Next enable the payment method, via (assuming you’re on the newest version of WooCommerce):
- WooCommerce > Settings
- Payments Tab
- Tick the Enabled Switch next to V12:

- Now enter your V12 details:
- From the screen above, click the Manage button next to V12.
- This will display the V12 settings screen, you’ll need to fill in the following boxes with the details that you’ve been given by V12 themselves (usually in a spreadsheet document):
- Authentication Key
- Retailer Guid
- Retailer Id
- Click Save at the bottom.
- Now refresh the V12 products that are available on your account using the “Update Finance Products from V12.” Link found under the heading V12 Available Finance Option:
![]()
-
- Once done you should get a table of available Finance products.
- Next will be choosing what finance products you wish to offer, for example:
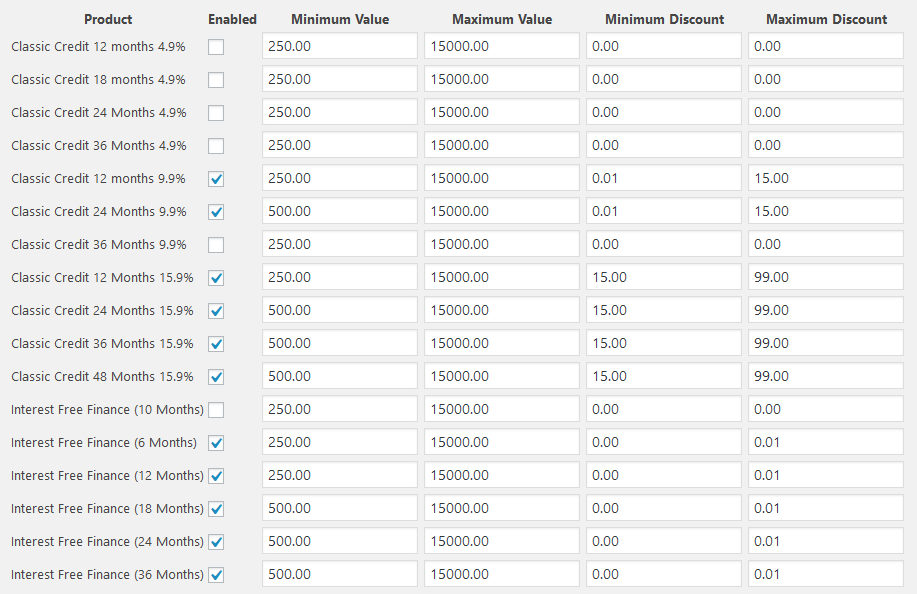
The ones that are ticked are available to the customer based on the min / max value of their order. We use the Min / Max Discount to set certain products against discounted items, ie: Interest Free is only on non-sale items, whereas 9.9% is offered against items with an up to 15% discount and the 15.9% on anything with a further discount to that.
-
- Once you’ve ticked / tweaked the ones you want then click Save.
- Your site should now display V12 as an option on the checkout.
There are other options but these should be enough to get you going, I hope that all makes sense but if you have further questions then please ask away.